Greetings Parents!
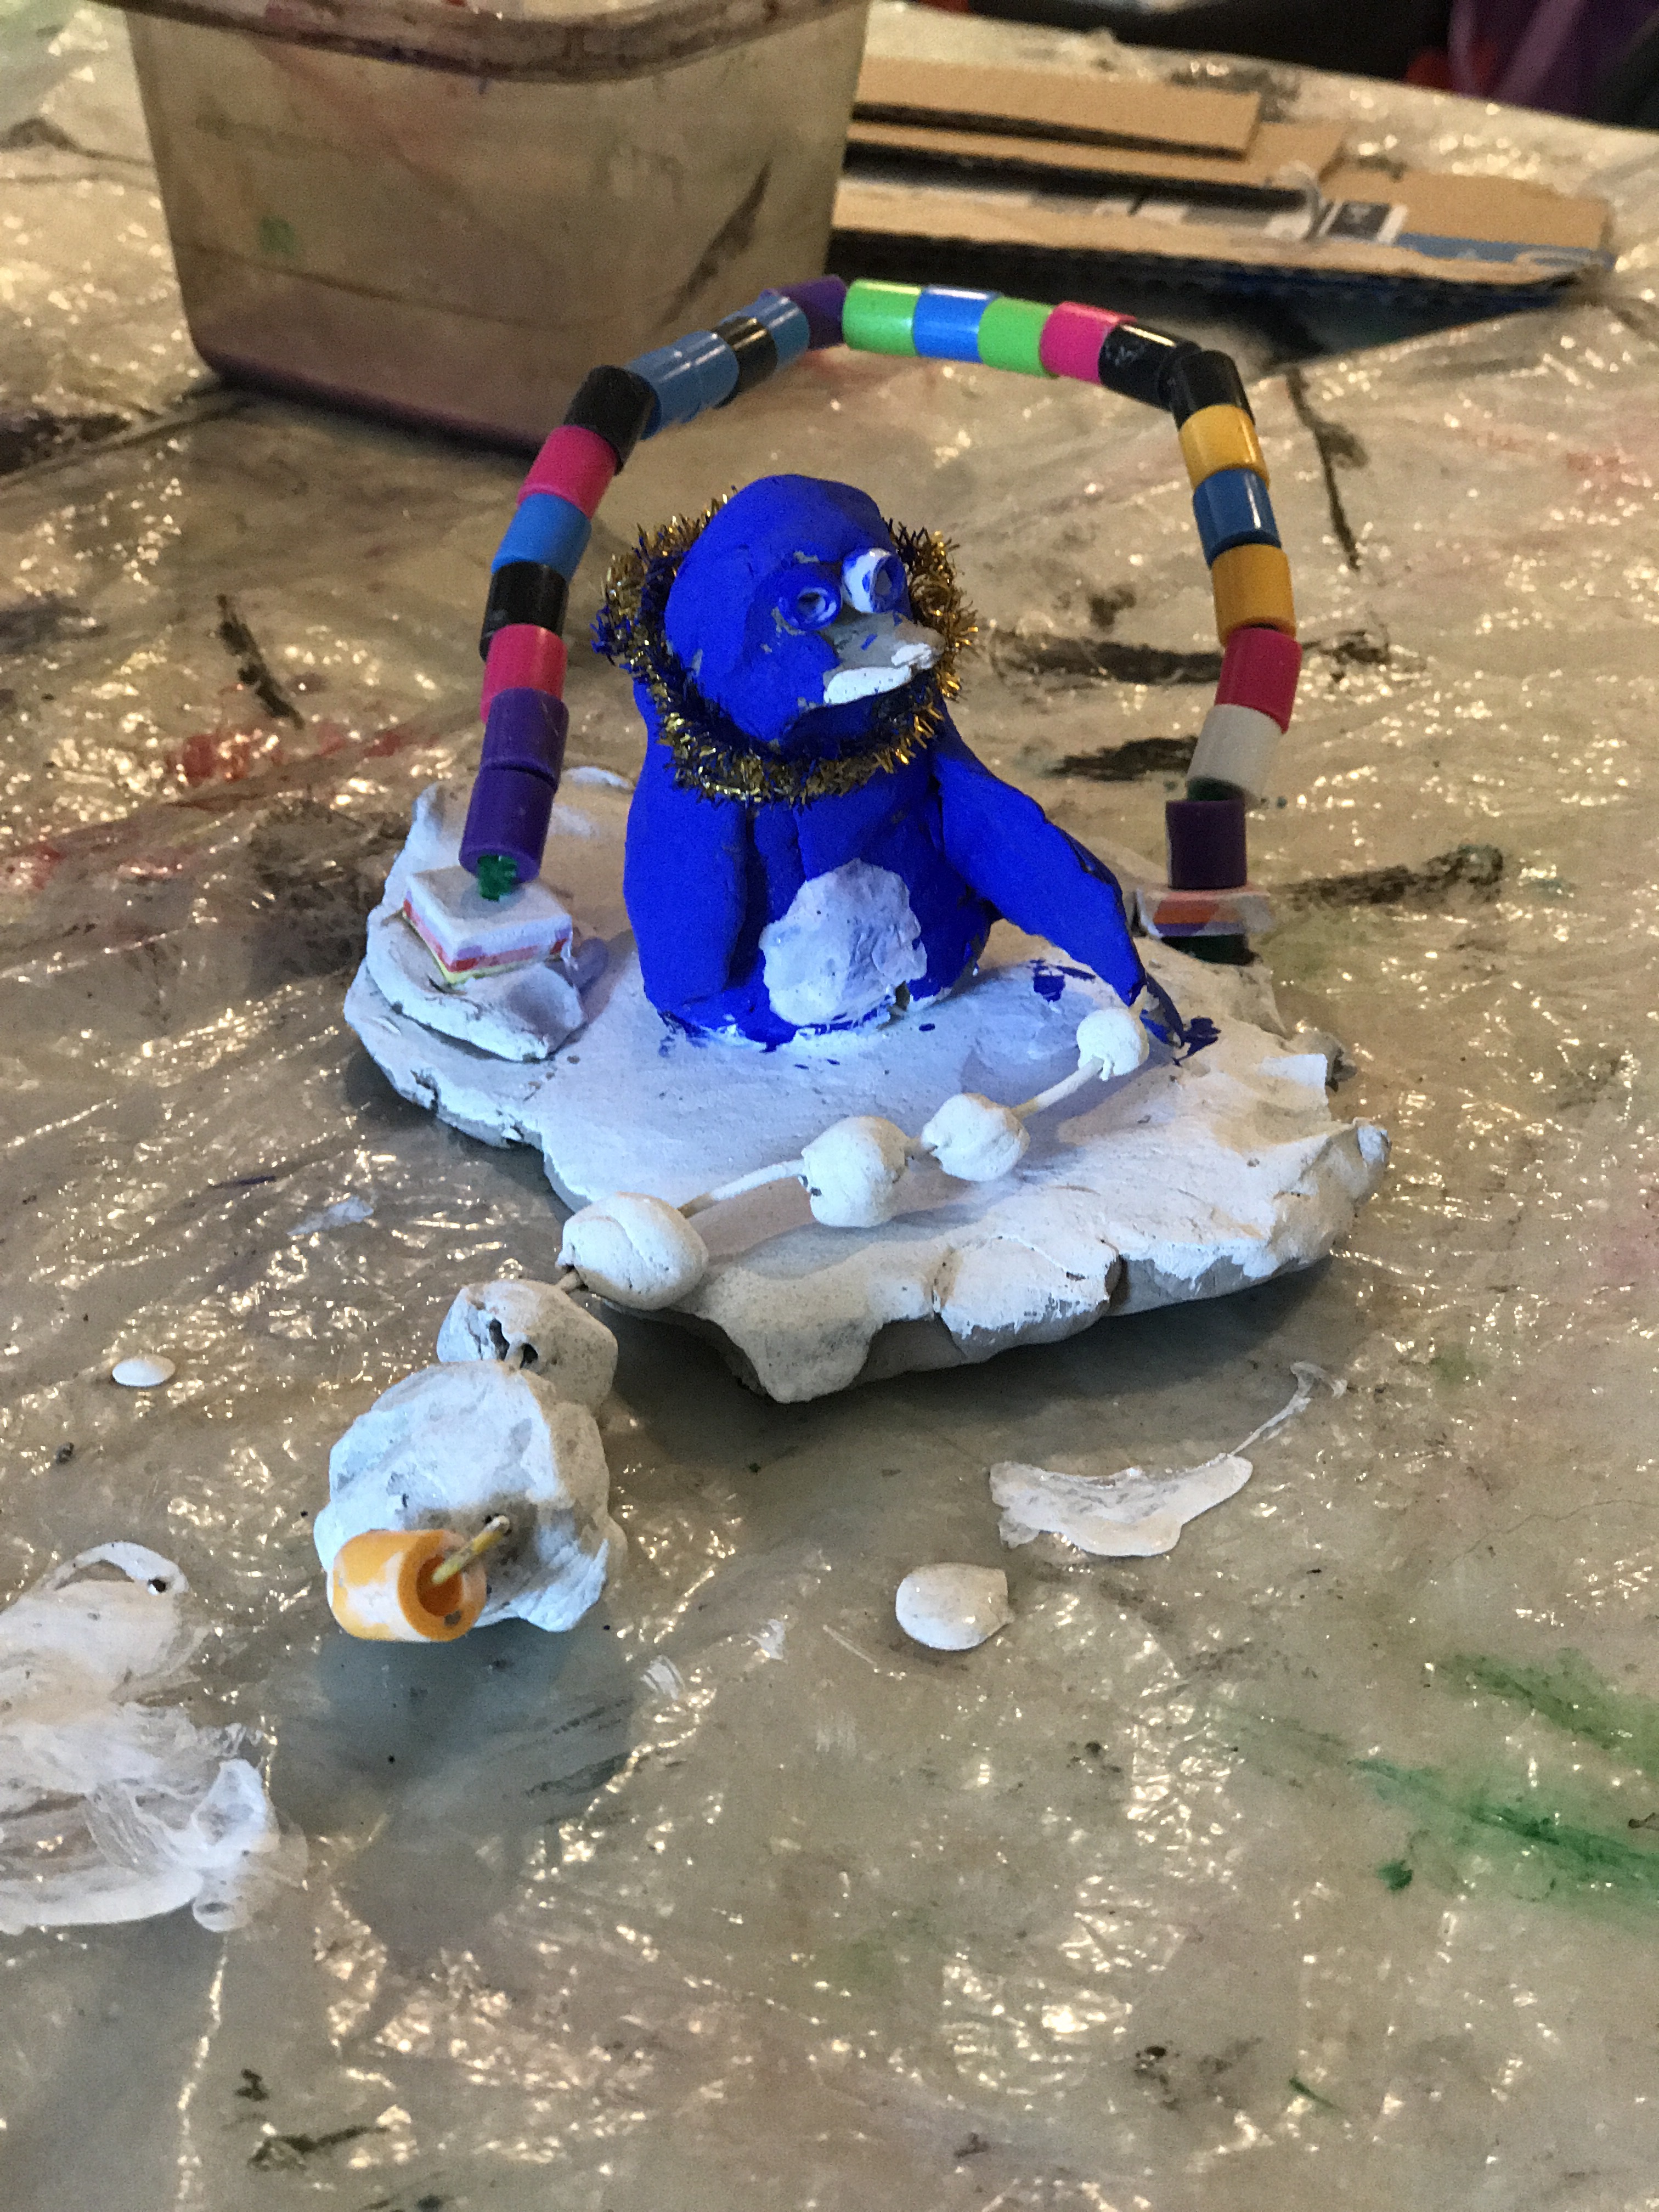
Alexander Calder (1898 – 1972) was a modern American sculptor. Calder is known for his giant, balanced mobiles that use repeating free form shapes in simple colors. As much as I enjoy his mobiles, my favorite works by Calder are his miniature circus. As a young boy, he went to see a circus and was so amazed by the tricks and performances he had seen that he wanted to create his own. Calder started creating his own performers in the 1920s and continued to add new ones throughout his life. Calder would use a combination of clay, wood, fabric, wire, tubing, and string to bring his figures to life by performing tricks like their real counterparts. A lion could rear at the snap of the lion tamers whip, a performer could spring onto a running horseback, or a trapeze artist could swing across the circus. In the 1955, “Circus” was a film by Jean Painleve of Calder’s performance of his circus. I showed parts of the film and other recordings to the artists. They loved seeing an artist in action and were amazed at the tricks his performers could accomplish.
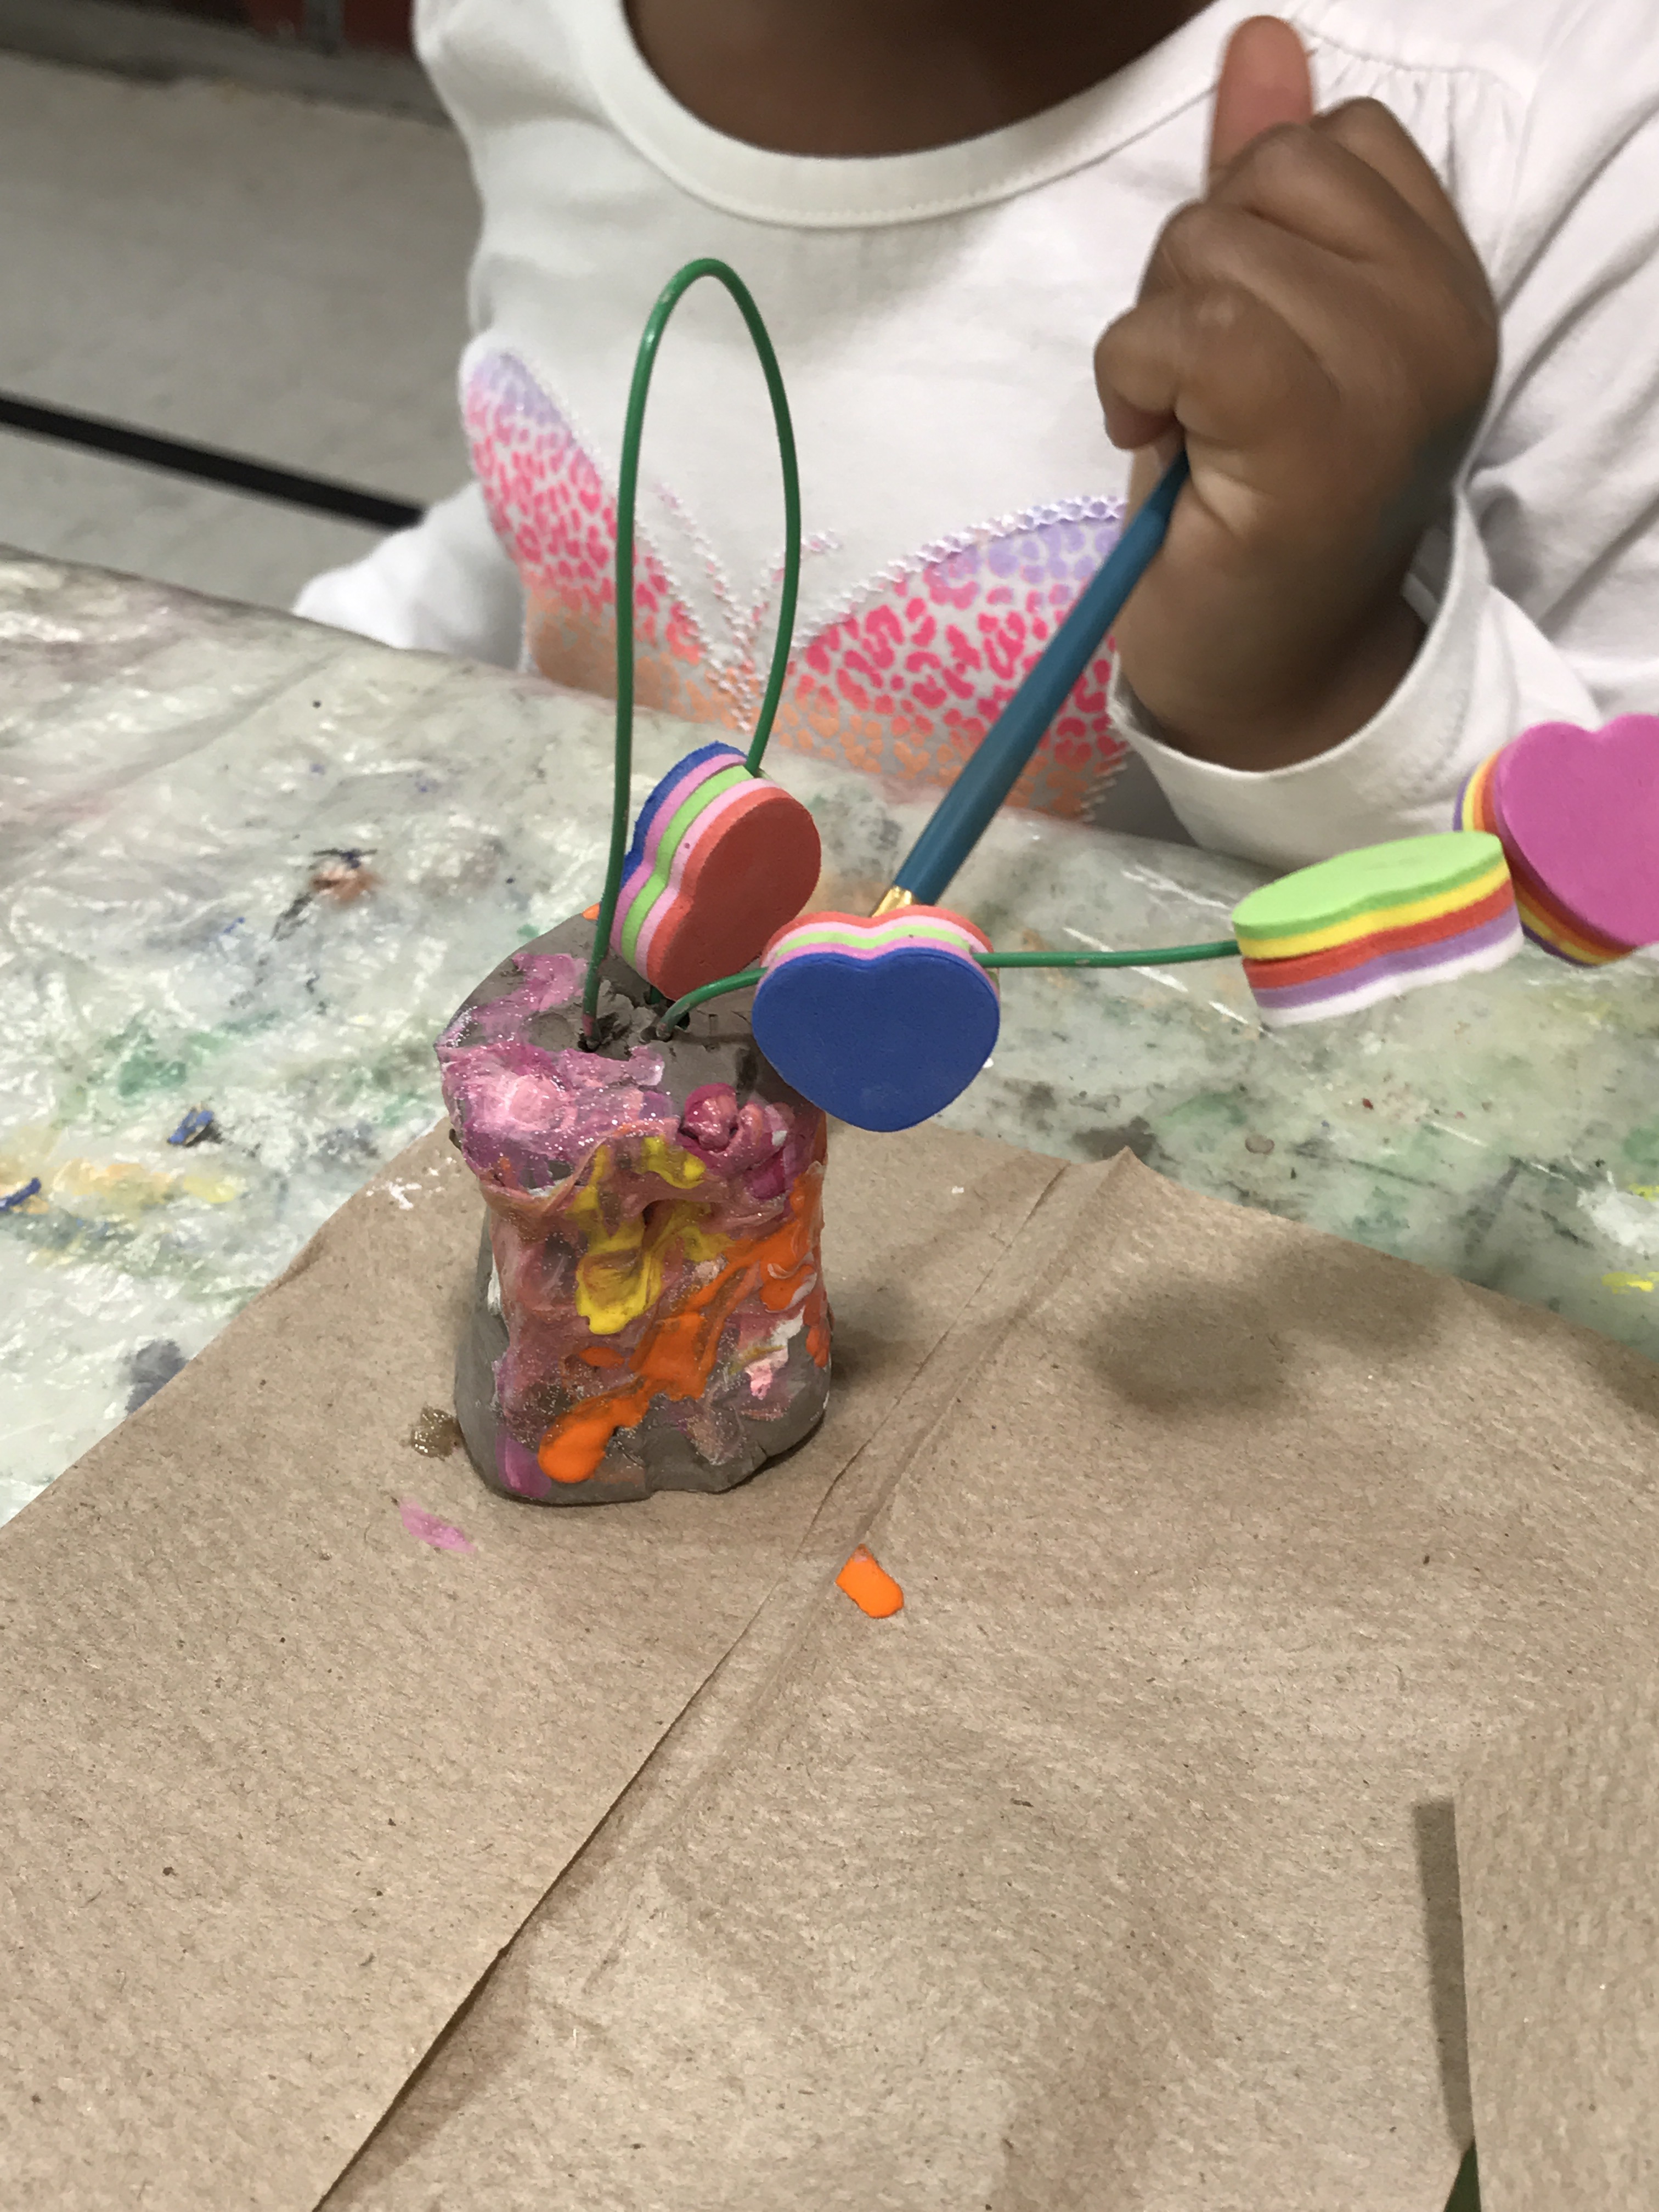
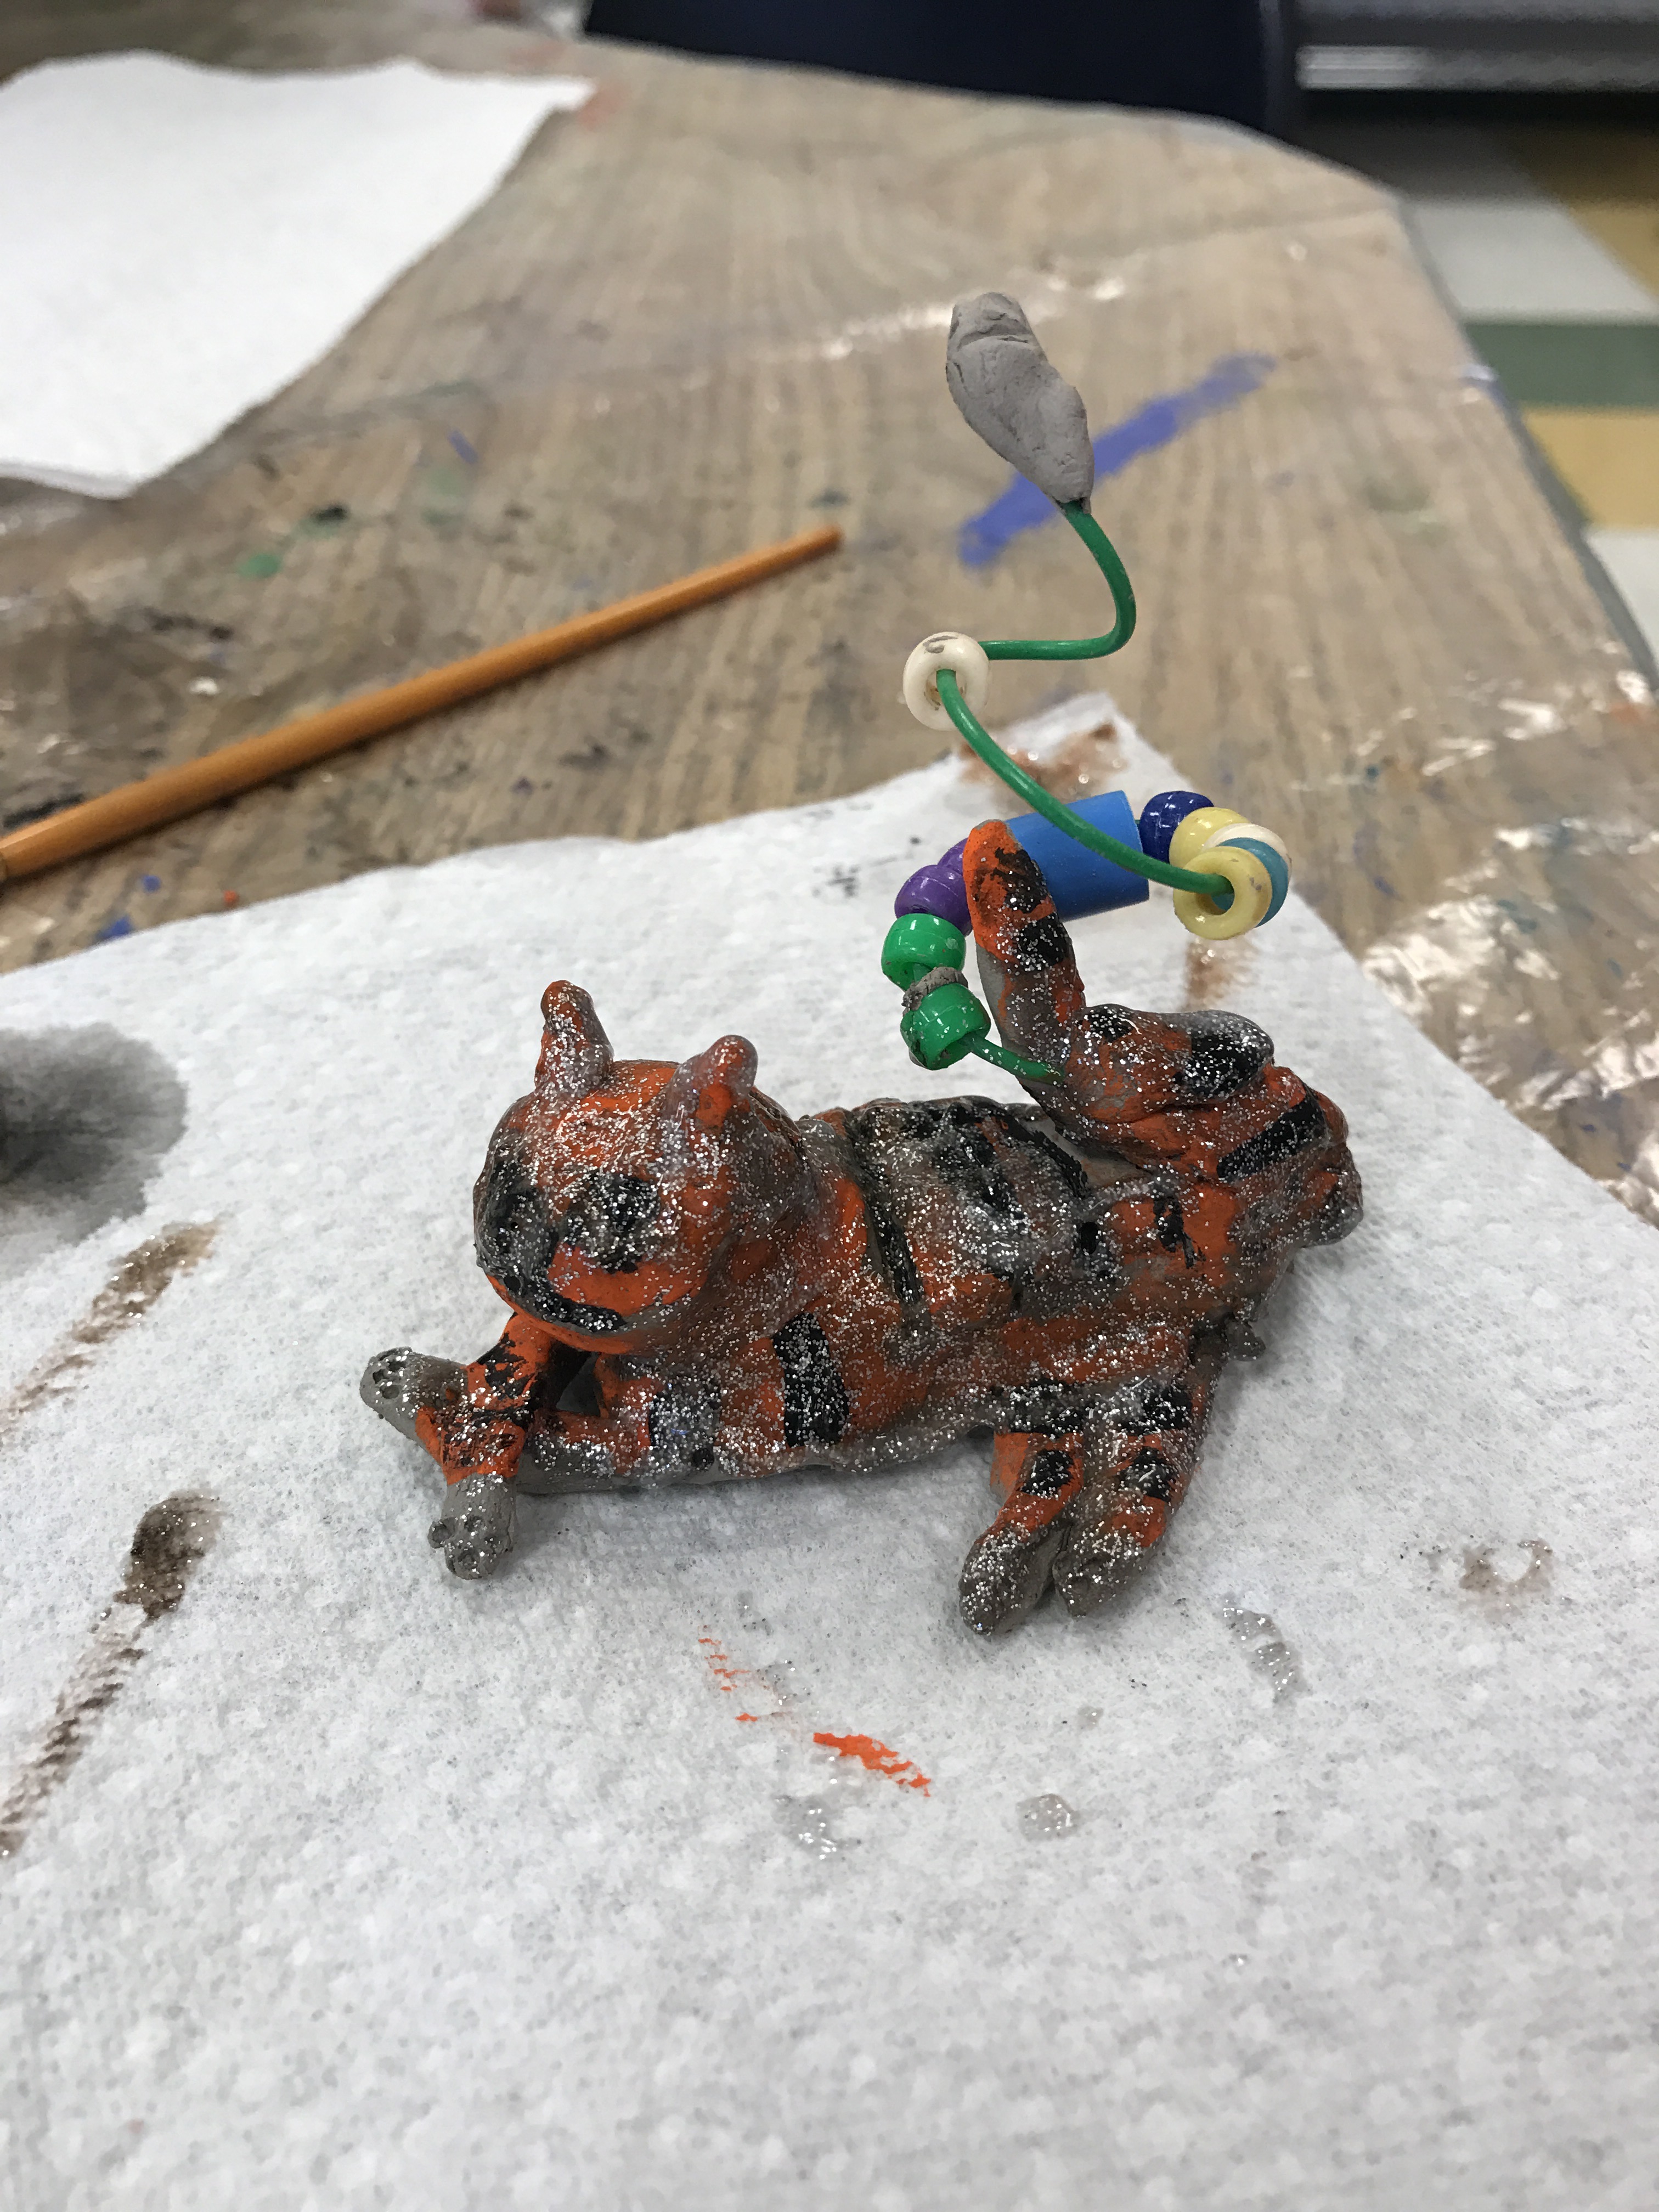
Since the Ringling Brothers Barnum and Bailey Circus are closing after 146 years, I thought it was perfect timing to introduce the students to Calder’s Circus. Many of the artists have been to the circus and loved sharing their favorite parts. For the younger sculptors, I gave them the choice of making a juggling seal or elephant head. My older students were able to choose a circus performer of their choice, animal, human, real, or imaginary. We used muddy clay again for this project and I went further into the binding process needed to help combine this clay together. I describe this process as the 4 S’s: Scoring, Slip, Sticking, and Smoothing. To score clay, the surface must be roughened with small lines or dots by using any of the clay tools. Next, a thin layer of slip, a mixture of clay and water, must be rubbed onto the scored surface. It makes the clay slippery and almost acts like glue. Then, the sculptor must stick the new piece of clay onto the scored and slipped area of the slab. The final step is to smooth the line left between the two pieces by rubbing the clay back and forth or up and down so that it looks as though the clay was always one piece. The added moisture of the slip also makes it easier to smooth. These steps needed to be completed each time part of their performers was put together. The sculptors were free to create faces on their performers or create a texture for their bodies. The final step of the circus seal/elephant/performer was to create the illusion of juggling. For this, we twisted and wrapped up to three Twisteeze wire around our finger to create a spiral or spring look. Once the wire was bent, we threaded different beads on the wire to look like the performers were juggling. We did this to imply movement to the viewers since Calder’s performers could perform tricks. Finally, the sculptors chose whether this movement was bouncing off a head or a trunk, between flippers/arms, or off a tail.
For the second class, everyone could choose up to 4 colors to paint their seals. At this time of year, I allow them to choose their own colors, which is also an excellent time for them to experiment with color mixing or practice what they have learned in Mini Monets. If the artists finished early, they were able to free paint or free sculpt.
Given the break from my son being sick, most of these performers were sent home last week and a few will be heading home this week. I want to remind you that this clay is more fragile than the white modeling clay. It’s the downside to this type of clay. It is more diverse in the use of it for sculpting and pottery but it is extremely breakable. I urge caution when handling their circus performers.
The objectives of these projects were to educate the students about the works of Alexander Calder and how different types of clay require new techniques when creating sculptures. Next we will be working on low relief paper sculpture of a Rooster.


Posted by: MiniMonets | May 20, 2017
Alexander Calder Circus Animals.
Posted in art classes

Leave a comment