Greetings Parents!
Welcome to Clay and Sculpture! This is one of my favorite sessions because I love to create in 3 dimensions. For our first project, I introduce the artists to clay with Crayola Model Magic. I like to use this for several reasons. The first reason being that it isn’t messy. This gives the artists no reservations about having messy hands. The second reason is that it is designed to stick to itself and not break apart once dried like Play Doh can. Model Magic is also like Play Doh because the more you work with it, the softer it gets. The final reason is that if dropped, it’s not as breakable as clay that we will be working with in future projects. This is great practice for handling the dried clay gently as they are being painted.
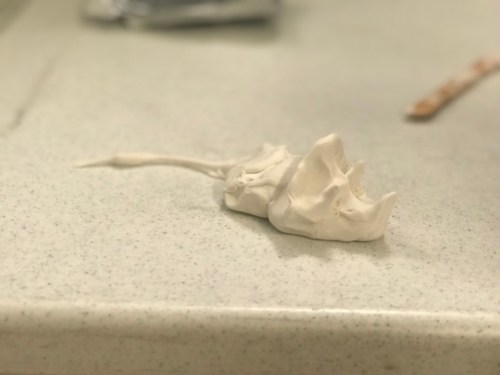
For our first project, we created dinosaurshatching from eggs. I read the book; My Allosaur has Lost His Roar by Elwyn Tate. This is a book about dinosaur who used to love to Roar, then loses it, and has a friend help him find it once again.. It was also the inspiration for one type of dinosaur the artists wanted to make. When first given a piece of clay, it should be kneaded to prepare it for use. Model Magic needs to be kneaded longer than regular clay to get the desired soft texture. Once the clay was kneaded and soft, we began to shape our dinosaurs. I always start the C&S session with a sculpture that is created only by pinching and pulling the clay. This is a beginning movement for manipulation of the starting clay, just as drawing/painting lines is the beginning process for two-dimensional art. The sculptors could chose between an Allosaur and a Triceratops. Both would start by being rolled into a cylindrical shape. From this point, pinching and pulling the clay would create all parts of the dinosaurs. We started by pinching out a head, and then moved to creating their tales. Next would be pinching out the bony frill of the Triceratops. The last part would be learning to pinch in different directions (up and down, side to side) to create the small arms of the Allosaur and the 3 horns of the Triceratops. Clay tools were then passed around to press in a scaly texture or teeth for the Allosaur.
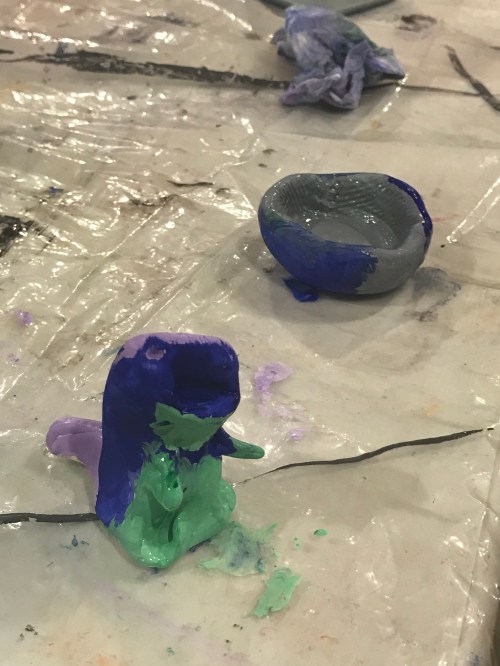
During the second week, I gave the sculptors a new pack of Model Magic. While they kneaded, I read the book, Dinosaur Babiesby Lucille Penner. This time we would be creating a nest for our dinosaurs and would focus on using texture plates to create the feel and look of a dinosaur next. To begin, the sculptors created pinch pots, where the clay is rolled into a sphere-like shape, a thumbhole is pressed into the middle, and then pincher fingers (thumb and first/second fingers) are used to stretch out by pinching and pulling the clay into the desired final shape. Pinch pots are the oldest form of pottery and I like to introduce this idea to the artists. Once everyone had their pot made, we went manipulated it to look like a ground nest. Then I passed around texture plates. We discussed what texture is and looked for examples of different textures in our classrooms. Finally, the artists pressed the different types of texture plates onto their nests to create texture on the smooth Model Magic.
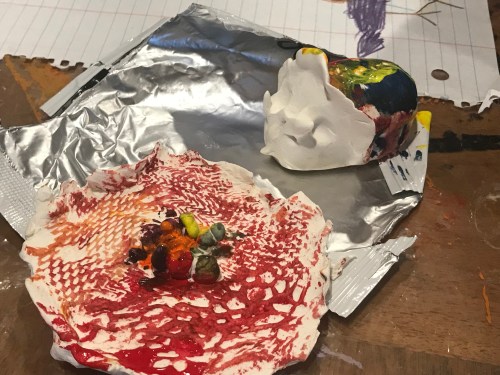
For the third class, I began by asking the artists what type of skin dinosaurs had. We know that dinosaurs were reptiles and were covered with scales, plates, or feathers. Science has not been able to confirm what color(s) dinosaurs were but we assume that since they were reptiles, they would have similar colors to reptiles living today. Green, brown, orange, and yellow were the four camouflage colors that I chose to offer artists who wanted their dinosaurs to look more like how they are pictured in books. The other set of colors, red, blue, pink, and white, were more of a fantasy choice that I offered to the artists. The artists had to fully paint their dinosaur and nest and they were encouraged to add patterns by layering paint or mixing colors


Leave a comment